Thursday, April 30, 2015

Self Portraits Reflect Inner Color

So when I thought of coming back to this project for day 2 I wasn't very excited. Portrait, Shmortrait! So I thought of ways to mix it up and took a risk by allowing kids to paint their skin a color of their choice as opposed to using skin tones. 

I started off by talking to the kids about an orange. Yes, an orange. I talked about how our skin is like an orange- it can be smooth, bumpy and shiny at times but all it really does is hold our stuff in. Eventually, like an orange our skin will get old and wrinkly! 

Then I peeled the orange and had kids smell it while talking about the good stuff inside; tangy, juicy, cool and sweet. Just like YOU! Then I made the connection, and I think the kids got it, that it's not our skin color that matters but the colors of our insides that shine the most. When I asked the kids what colors they were inside every color of the rainbow was called out!
Check out these gorgeous portraits! The kids were do proud displaying their inner color!

Thursday, April 16, 2015

1st grade self portraits

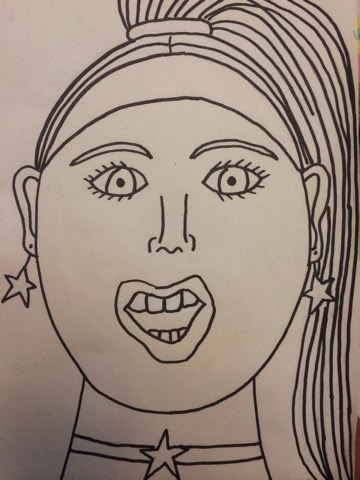
So I decided to teach self portraits to first grade with the goal of teaching face proportion and realistic features. This was a good choice as it really helped kids become aware of their features, where they are placed, sizing and overall basic drawing techiniques. This project will probably take more than 2 visits. Here are some pictures of the pencil sketch stage. I LOVE how they experimented with big, toothy smiles. I also think they did an Awesome job ditching the triangle nose and trying out different nose drawing techniques! They are all so unique and different- my favorite part!


Saturday, March 28, 2015

2nd Grade Futurist Portraits

This project turned out great! About 45 minutes is guided and the second session is more independent. I will need to return to finish up the painting and matting and will update with final pictures. Here are some pics if portraits in progress.

Monday, March 23, 2015

Self Portraits

I am teaching a futuristic self portrait project in a 2nd grade classroom this week. I decided to to keep this project relatively simple as it can be modified easily. I went ahead and created an oval face template so that kids could trace for consistency. I made up a packet of facial features that groups can share to generate more ideas for eyes, nose, mouths, etc.
The students will draw on white 9x12 construction paper then draw over their pencil using black sharpie. Once done, students will color in their drawing with crayon EXCEPT for the face/neck/ear skin. I will emphasize good craftsmanship with crayon application- OH, and remember to color whites of the eyes and teeth!
Then with a watered down brown tempera, kids will apply paint over their crayon for a wax resist skin tone finish.
After the portrait dries they can cut out their port at and glue it in a pice of contrasting colored paper to make it "Pop"!


Sunday, March 15, 2015

Bloglovin'

You can follow this blog on Bloglovin'!
<a href="http://www.bloglovin.com/blog/13822435/?claim=cxzgrxgpxz2">Follow my blog with Bloglovin</a>

Friday, March 6, 2015

4th Grade Zentangle Shamrocks

I LOVE teaching the art of Zentangle and how it got its name. Once kids understood the simplicity of creating repeated line designs I told them to try and clear their minds of everything except the line they were creating. We dimmed the lights and the kids quitetly and calmly worked fo 40 minutes. I did not expect them to focus in like they did! I was super proud of room 25!

Sunday, March 1, 2015

Zentangle Shamrock

I will teach the 4th grade class the art of zentangles and have them apply zentangle patterns to a 4-leaf clover just in time for St. Parricks Day!